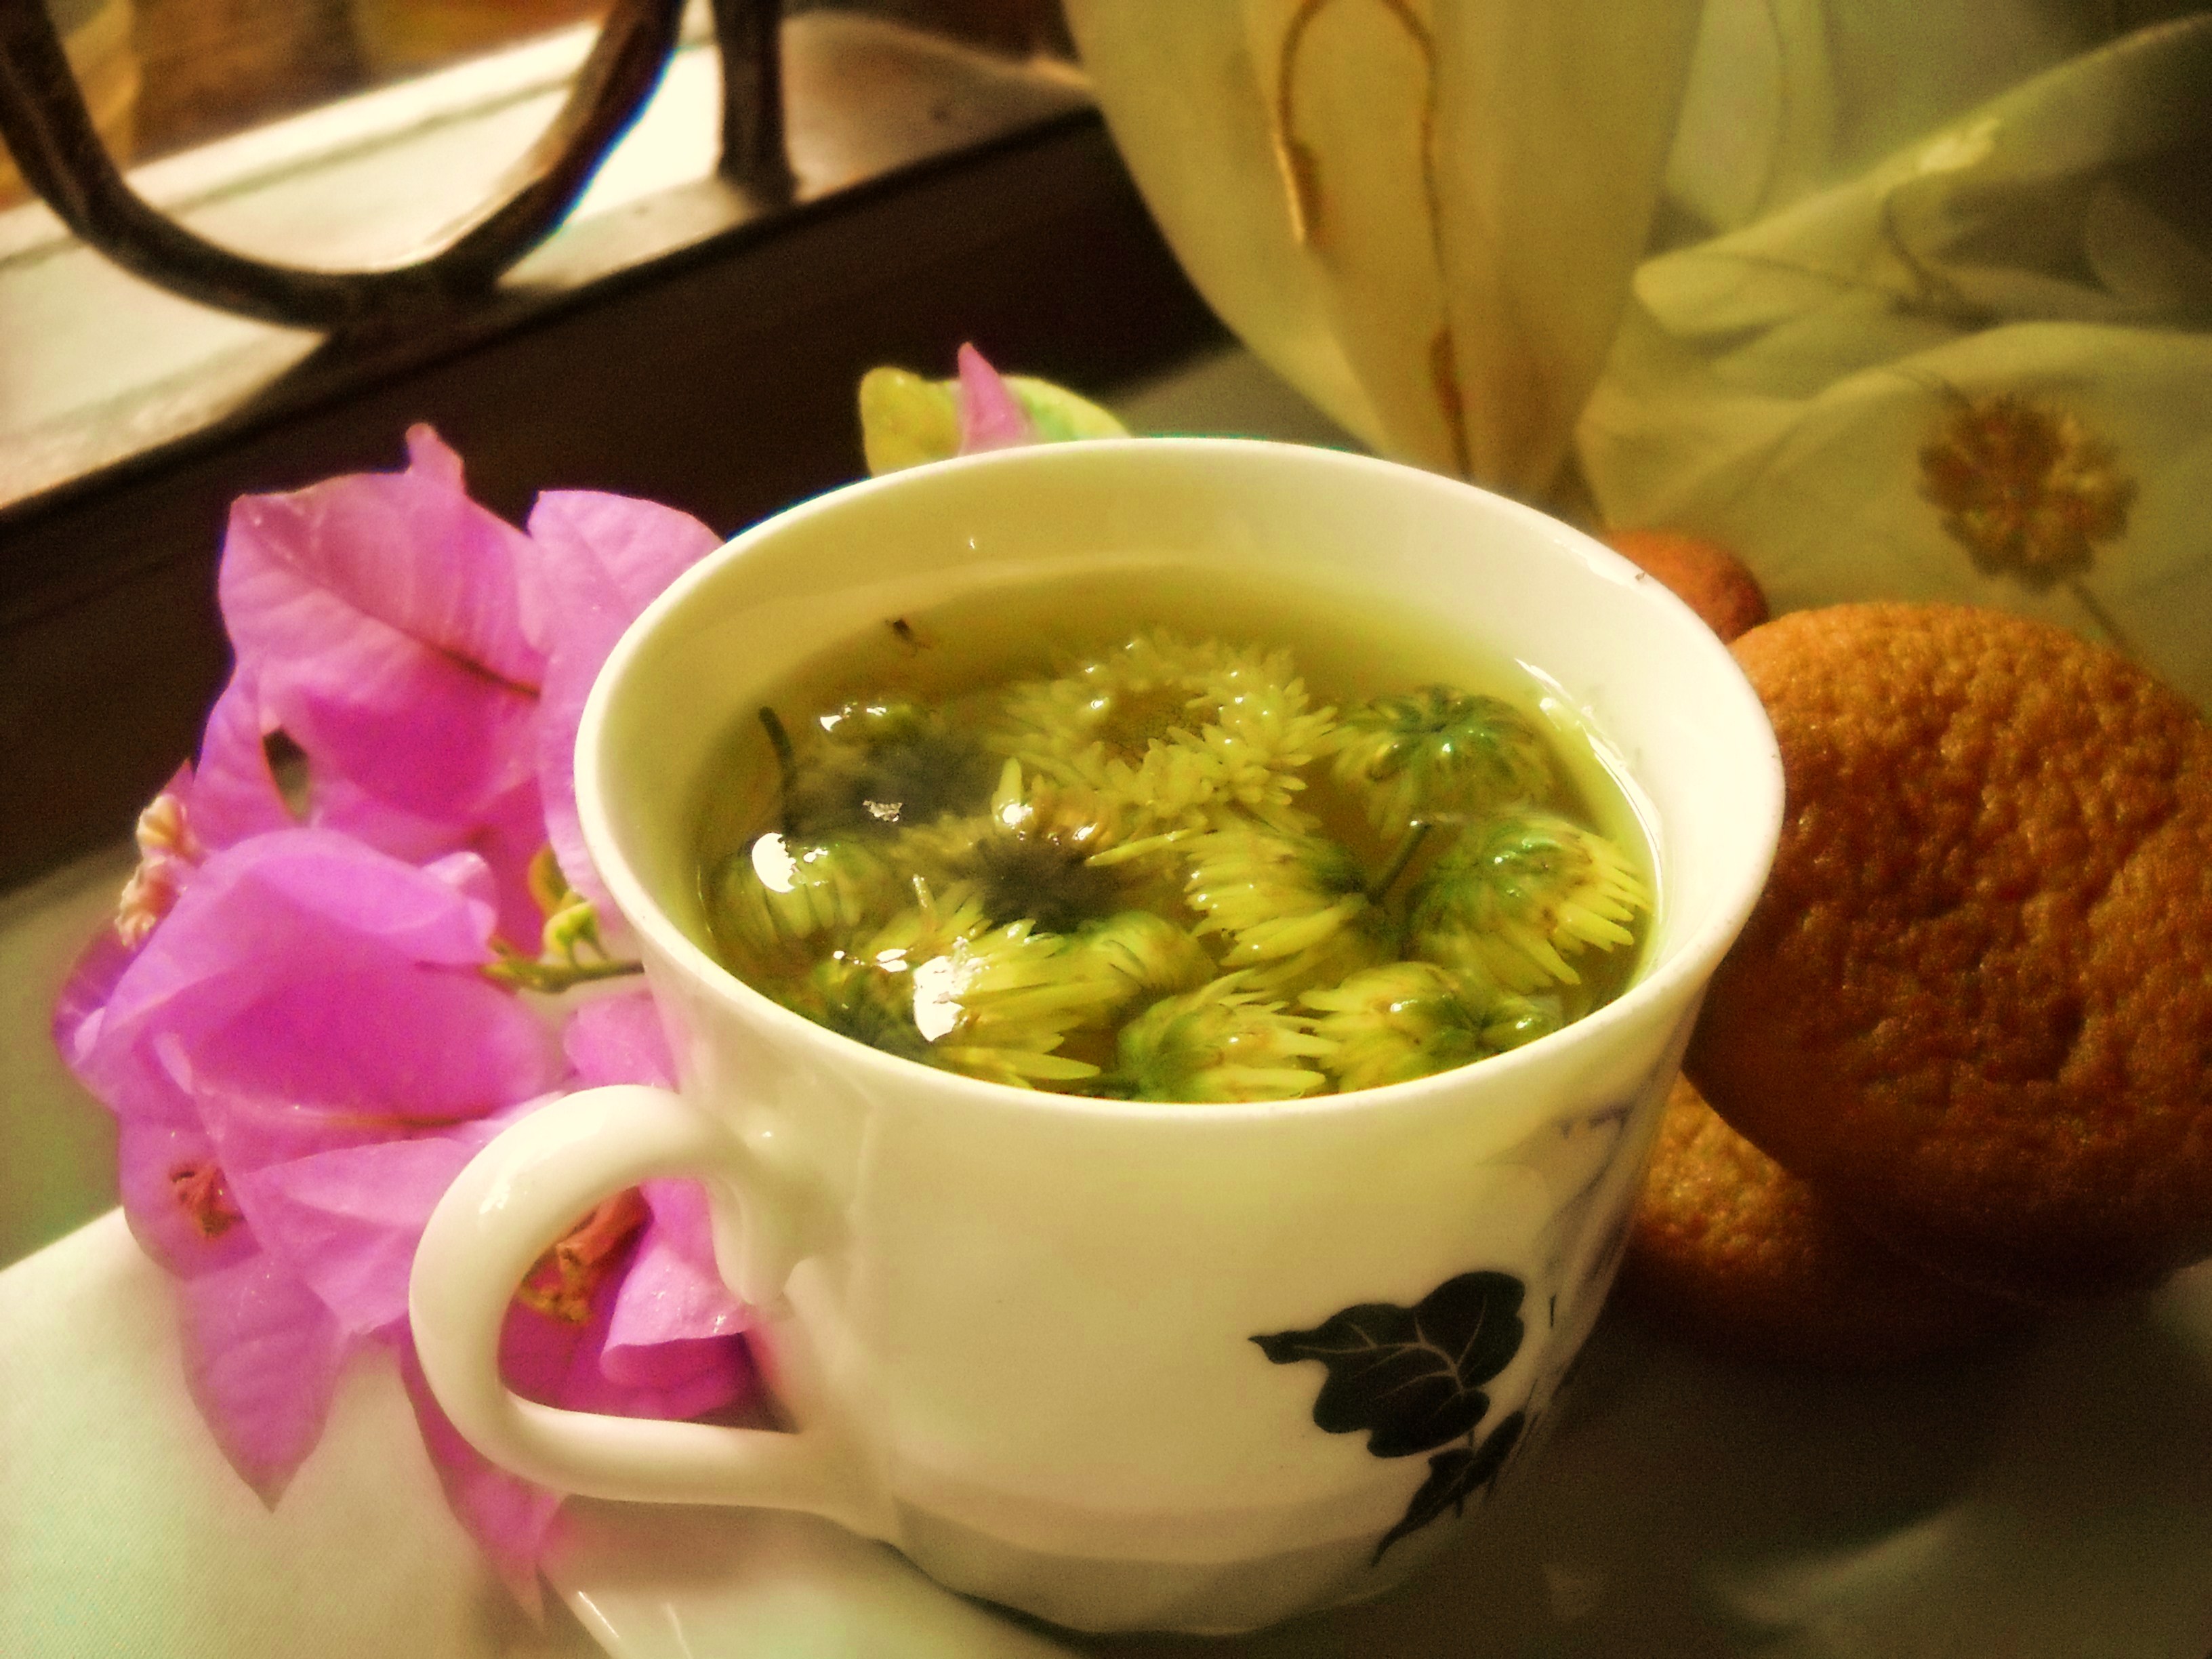
Welcome to the Order of the Sacred Star! This Pagan/Wiccan group, based in Winnipeg, Canada, is committed to teaching the Craft to all those who wish to learn. Our goal is to provide a complete and fulfulling learning experience. Our public classes are offered through the Winnipeg Pagan Teaching Circle.

Friday, January 30, 2015

Herbology: Extraction Methods

There are several methods by which you can extract the herbal properties you're looking for. Which herbal preparation you choose depends on the herb and the purpose for which you'll be using it. Because of this, different methods can and will be used for the same herb. An herbal infusion will have different properties than an herbal tincture, even if the same herb is used in both. So be aware of the different methods as you continue your study of herbology.

Infusion

This method is absolutely the most common in herbology. It is simple, typically quick (in term of effort, not necessarily time), and doesn't require much in the way of equipment. Do you have a glass jar and some water? You can make an herbal infusion. Feel free to do so in your own home with the materials you have on hand.

The infusion may be either hot or cold. In a hot water infusion, the water is boiled, then taken off the heat until its not boiling, and poured over the herbs while still hot. Because boiling water can destroy some of the medicinal properties of herbs, waiting until the boiling stops is essential. Cold water infusions are done when the water is no longer hot at all.

Hot water infusions are faster because they extract the medicinal properties of herbs faster. They are not, however, always the best choice. Some of the more delicate herbs are better done in a cold water infusion, even if you have to set the infusion in the sun for a week before using it. Always consider the particular herb before choosing an infusion method.

Decoction

Though this term can be used to refer to any preparation created by using boiling water, it is typically used in herbology when the extraction made is to be boiled into a concentration. Though you might call the non-concentrated liquid a "tea", this liquid has little medicinal value. It is simply not concentrate enough, so the decoction is almost always boiled down. This method is easy enough to do at home.

Bear in mind that boiling an herb often destroys some of its more subtle medicinal properties, so it's not ideal in most cases. Still, there are decoctions that are highly effective, so keep this extraction method in your back pocket until you need it.

Tincture

Tinctures are basically infusions made with something other than water. Grain alcohols are the most common, but you can also make them with vinegar and wine (which is not grain-based). Like infusions, this one is simple to do at home. Since you don't generally heat the alcohol, tinctures typically take at least a few hours to prepare. Luckily this method also allows you to ignore the tincture for a while, so you're not actually having to tend it all day.

Maceration

There's a lot of confusion surrounding this term, so I'll be very clear. A maceration involves soaking plant material in liquid for so long it becomes a pulp. The liquid can be anything from water to alcohol to vinegar. This method take a long time and is quite irritating (because sometimes it all starts to ferment on you and you have to start all over again). Luckily, macerations aren't all that common in modern herbology.

Expression

This one should be easy enough to remember because to make an expression you "express" the liquid directly from the plant material. Note that you are not adding any of the plant material to your preparation. There should be no pulp in your expression. Think of it like making orange juice. You can squeeze the orange to get a pulp-free expression or you can twist the orange on a juicer to get a pulp-juice mix. With expressions you are after just the juice, not the pulp.

Expressions are not easy to make at home unless you have the right equipment. If you want to make your own expressions, invest in professional-grade equipment to assist you.

Percolation

If you've ever made percolated coffee, then you already know how to make a percolation. This extraction method can be done at home. You're better off buying professional equipment, but you can make due if you have to. To make an herbal percolation you'll need the following materials:
  • a large pot
  • a screen suspended in the vertical center of your pot
  • a domed lid for the pot that does not have a handle
Once you have all these items, place the herbs on the screen, right in the middle. Fill the pot with water until it is about an inch or two below the screen (the herbs should not be in the water). Put the lid of the pot on, but upside down. Looks a little silly, but trust me.

Now you can either make a cold water percolation or a warm water percolation. Fair warning: cold water percolations take a LONG time. Days. Many, many days. If you warm the water gently, the entire process happens faster (though still not fast). Either way, you should see water condense on the lid as it evaporates, roll down to the tip of the dome, and drip onto the herbs. You can speed up the process by putting ice on the inverted lid, but it will still take a while. This is not a method I recommend at home because of the frustrations involved.

Reflux

I'd rather eat glass than make a reflux at home, so do yourself a favor and leave the refluxing to the professionals. Refluxes are basically percolations using something other than water. Alcohol is the most common. Since alcohol tends to ignite on the stove, you absolutely must have professional equipment for this method. And hopefully a professional to show you how to do it. Don't do this at home.

As you can see, some of these methods are easier to pull off at home than others. Most recipes you will encounter will either be tinctures or infusions (or may just use the whole herb instead), so you don't really need complicated equipment. Just space to store your creations.

Friday, January 23, 2015

Herbology: Whole Herb or Extraction?


I'm often asked why we should bother with recipes and decoctions, with tinctures and poultices, when we can simply eat the herbs in question to get the desired results. Well, there's a problem with that particular approach. It's true that if you eat an awful lot of a certain herb, some of its healing properties may be imparted to you, but you'd have to practically eat yourself sick to get enough of the herb. Also, some of the active ingredients in the herbs simply will not pass into your system through ingestion.

Okay, so we can't always just eat the herbs we'd like to use. But why are there so many preparation methods? Why can't we just always brew a tea, or burn the herbs so that we inhale the active ingredients? Again, these methods work fine for some herbs but are useless for others. If the active ingredient you need isn't water soluble, a tea isn't going to help. A tincture, which uses alcohol to extract the active ingredients, might. As for using smoke, this only works for a few specific herbs and it's no good at all for anyone who can't inhale smoke (like my entire family).

The Pagan community often works on the premise that if it feels right, it is right. This is a dangerous idea when it comes to herbs because herbs are really a little more scientific. Does it feel right to use the plant in your backyard to cure your headaches? Oops, that was nightshade. Unless you understand the dosage and extraction method of nightshade, you could be in real trouble. It is poisonous, after all.

It is vitally important that you understand an herbs properties and the forms in which it is safe to administer. Some herbs are fine to ingest, but toxic when inhaled. Others are safe to inhale, but will give you a blistering rash if applied to the skin. And there are a few herbs that are safe to ingest as tinctures but toxic as teas. Knowledge of the herb as a whole is necessary before you begin working with any plant.

As an example of this, consider cinnamon. It's a common herb in both spellcraft and cooking, so you're highly likely to use it often. It can be used during ritual baths by adding the whole herb to your bath. It can be used in cooking in its powdered or shaved form. Its oil can be used to anoint candles and other items. But if you put the powdered version in your bath, you'll have a mess on your hands. Add the oil to your bath (or apply it directly to the skin) and you'll burn yourself. Add the whole form (or even the shaved form) to your candles during recipes and you'll start a fire.

Basil is another example. In its dried form, you can use it for money spells. Its fresh form can be rubbed on beestings to lessen irritation. But the dried form doesn't help beestings at all, while the fresh form can be used in spells if you like.

As you can see, you can't always take the easiest route. If a recipe calls for the oil form of an herb and you use the dried form, you may not get the results you desire. Easy doesn't always equal best, so tread with care. Study the herbs you'd like to use to best discover what method of herbal preparation is best suited for your purposes.

Friday, January 16, 2015

Herbology: Storing Herbs

Unless  have a greenhouse where you can grow fresh herbs all year 'round, at some point you'll have to store herbs for future use. Fresh herbs can be stored in plastic bags in the refrigerator, usually with a paper towel to absorb excess moisture, but this only works for a week or two. Eventually you'll have to store dried herbs.

Before you even attempt to store your herbs, make sure they're truly dry. Any hint of moisture and they're mold in short order. So give your herbs time to dry thoroughly before you attempt to store them.

Once they are dry, the best way to store them is with a vacuum-pack system. You can purchase these systems at most cookware or home stores. There are two downsides to a vacuum system. First of all, they can be expensive and not everyone wants to spend that money for storing herbs (even though the vacuum system can be used for other foods as well). The second problem is one of convenience. Every time you open a package to get a teaspoon of herbs, you have to cut open a package and reseal it with the vacuum system. That can get annoying.

So if you opt not to use a vacuum-pack system, your next best choice is glass jars. You can get jars in all sizes from almost any grocery or home store, and you can get them in a variety of sizes. I like the smaller ones because I rotate my stock frequently, though I use larger jars for the herbs I use a lot of. Before you actually store anything in these jars, sterilize them with boiling water and dry them thoroughly. This will help protect the herbs from bacteria and keep them fresh longer.

Always store dried herbs in cool and dry place. They should also be kept out of direct sunlight. I use a cupboard with a solid door and good ventilation, one that I only open one or twice a day. This seems to work well, but any place that keeps the herbs cool and dry should work well enough.

Even dried herbs don't last forever, so make sure you rotate your stock. I like to make sure jars are emptied and replaced at least every six months. Since I use my herbs faster than that, this isn't usually an issue. But I do write dates on my jars just in case. After six months, dried herbs really do lose their potency, so make sure you're not using herbs that have been in the jars for a year.

Some fresh herbs can be frozen, but this doesn't work as well as drying them and storing them appropriately. Whatever method you choose for storing your herbs, make sure you label your herbs. It's not going to help to have no idea what's in each jar or bag.

Friday, January 9, 2015

Herbology: Drying Herbs

In many cases drying herbs is unnecessary and just a little silly. If you have fresh lavender growing in your windowsill and want to make lavender cookies (which are a staple in our household), there is no reason to dry the lavender first. No reason at all. Simply pluck the lavender, remove the parts you won't be using, and toss the fresh lavender into the cookie dough. The same rule applies to just about any herb you have growing at the time. Fresh is generally better.

Bear in mind, however, that when using fresh herbs, you'll usually need more than you would if the herb was dried. This is because fresh herbs contain a great deal of water, water that is removed through the drying process, making the dried version much more potent. As a general rule, you'll want to use three times the amount of fresh herb, so if a recipe calls for 1 tbsp of dried lavender, you would use 3 tbsp of fresh lavender.

So fresh is better. But what if you have a bunch of herb on the vine that needs to be harvested all at once? It happens, and quite often. In this case, you'll want to store them for future use. You can, of course, store fresh herbs in a plastic bag for up to two weeks. Simply fold them inside a paper towel, place the entire thing in the plastic bag, and place the bag in the fridge. But what if you're not going to be able to use all your herbs within those two weeks? Well, drying is your best option. There are different methods for drying, each one dependent on the part of the plant being used.

Drying Leaves

Leaves are the probably the most common item to dry, at least in a home setting. They're also pretty easy to dry. Simply separate the leaves and place them on a drying sheet. If you don't have a drying rack, use a cooling rack, the kind you put cookies on to cool. Place this rack in a location where it will not be disturbed by anyone, making sure not to expose the leaves to direct sunlight or sudden changes in temperature. Turn the leaves twice a day until completely dry. Under normal conditions, your leaves should be dry within a week. If mold develops, discard affected plant material.

Drying Flowers

If you really get into growing your own herbs, you'll often find yourself drying flowers. There are basically two ways to do this--on the stalk and off the stalk. If you dry them off the stalk, you can dry them just like leaves. Personally, I prefer to dry them on the stalk. I've just had better results. Take your stalks, complete with flowers, and invert the entire thing, then hang it that way. I like to use clothespins on a string in my temple, but you can use any system you like. Just make sure your herbs have a steady humidity and temperature, and give flowers at least a full two weeks to dry.

Drying Berries

If you're drying berries, which I do all the time, it's best to dry them on the stalk just like flowers. Absolutely keep them out of direct sunlight and give them a full month, sometimes six weeks, before you try to bag them. Make sure they'll fully and completely dry before you even attempt to bag them.

Drying Seeds

I love drying seeds because it's just so easy. First, separate them from the plant and remove any excess plant material. then get a piece of cheesecloth or an organza pouch or something similar. Hang the bag just like you would hang berries or flowers, making sure to shake the bag once a day to rotate the seeds. Seeds normally take two to four weeks to truly dry, so be patient.

Drying Roots

I hate roots. Hate them, hate them, hate them. Why do I hate them. Because they take forever to dry. And when I say forever, I mean about a year. Seriously. They might look dry after a month, but the inside is not dry. Not at all. They really need nine to twelve months. You can use drying racks, but since the roots have to dry for such a long time, I prefer to use organza bags (pretty ones) and hang the roots like I would seeds. Then I can ignore them for a year. Just remember to check for mold periodically.

There are other ways to dry herbs, including using a food dehydrator or even the oven, but the faster you dry herbs, the more of their potency you'll lose. So take your time, dry them naturally, and enjoy the fruits of your labor.